This blog is part of my GitOps series, and in this post lets gets some hands on experience with argocd by setting it up from scratch , and deploying our first application using GitOps principle.
Before going further in this blog, make sure you have got your fundamentals right by referring to my previous blogs.
Installation and configuration #
Disclaimer : In this post we will be deploying a simple sandbox grade argocd cluster which would be running on k3s cluster deployed locally. This is just to get some hands on experience, production grade setup and tuning would be discussed in my upcoming series which is Operating with GitOps at Scale.
Alright then, lets gets some hands on experience with ArgoCD.
I will be using the following system spec’s to demonstrate the setup.
- Hardware — CPU (2core), Memory (4GB), disk (50GB)
- Operating System — Ubuntu-24.04.1 LTS
- Container Orchestrator — k3s
Step-1: Installing the binaries.
Create a namespace : kubectl create ns argocd
Install argocd from the official manifest file : kubectl apply -n argocd -f https://raw.githubusercontent.com/argoproj/argo-cd/stable/manifests/install.yaml
Step-2: Validate if all the pods and services in argocd namespace is up and active.
kubectl get pods -n argocd && kubectl get svc -n

Step-3 : Expose the argocd application to access via client
Now that we have argocd resources like controller, server etc up and running we need to expose the argocd service via ingress or node-port to be able to access it via browser
For this lets create a simple ingress which uses traefik ingress class in argocd namespace.
Traefik comes preinstalled as part of argocd binary, you can verify if the resource is installed and working fine using kubectl get pods -n kube-system | grep traefik
apiVersion: networking.k8s.io/v1
kind: Ingress
metadata:
  name: argocd-ingress
  namespace: argocd
spec:
  ingressClassName: traefik
  rules:
    - host: argocd.local
      http:
        paths:
          - path: /
            pathType: Prefix
            backend:
              service:
                name: argocd-server
                port:
                  number: 80
kubectl apply -f argocd-ingress.yaml
Step-4 : Update the local hosts file ( Optional )
Update the hosts file so that you can use argocd.local as the DNS for argocd instead of node_ip
vi /etc/hosts
<NODE_IP> argocd.local
Step-5 : Update the argocd config map to load the UI
Note : This step is to be performed only in your local setup to run the application in an in-secure mode (on http) , do not do this in production
kubectl edit configmap argocd-cmd-params-cm -n argocd
Add or update the data block in config-map.
apiVersion: v1
data:
  server.insecure: "true" ## Added this line in configMap.
kind: ConfigMap
metadata:
  annotations:
    ...
    ...
    ...
Post the above edit do a restart of argocd-server to take these config changes. kubectl rollout restart deployment argocd-server -n argocd
Now you will be able to access http://argocd.local on your browser.
- Default username is admin
- Default admin password can be obtained from argocd secret by running the following command :
kubectl -n argocd get secret argocd-initial-admin-secret -o jsonpath="{.data.password}" | base64 -d
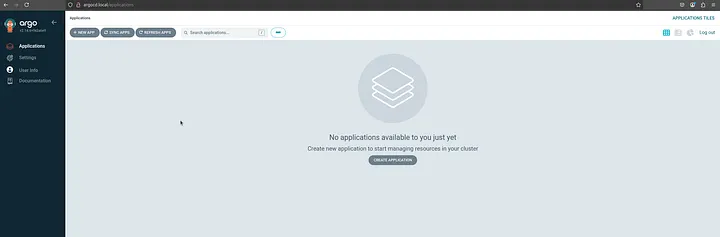
With this we have now successfully completed the basic argocd setup (without sso and ssl) and ready to deploy our first application.
Step-6 : Install and configure argocd cli
Copy the below script and give it executable permission chmod +x argocd-cli.sh and run the script ./argocd-cli.sh to install the argocd cli
# Default Arch and OS
ARGO_OS="linux"
ARGO_ARCH="arm64"

# Installing the latest version
ARGOCD_VERSION=$(curl --silent "https://api.github.com/repos/argoproj/argo-cd/releases/latest" | grep '"tag_name"' | sed -E 's/.*"([^"]+)".*/\1/')
curl -sSL -o /tmp/argocd-${ARGOCD_VERSION} https://github.com/argoproj/argo-cd/releases/download/${ARGOCD_VERSION}/argocd-${ARGO_OS}-${ARGO_ARCH}
chmod +x /tmp/argocd-${ARGOCD_VERSION}
sudo mv /tmp/argocd-${ARGOCD_VERSION} /usr/local/bin/argocd
Once installed, connect to the argocd server using the following command — argocd login <server-url>
argocd login argocd.local
Deploying a Sample Application #
With all the prerequisites in place, lets now deploy a sample hello world application.
There are three ways to deploy applications in Argocd.
- ArgoCD User Interface — By navigating on the default argocd UI and creating the application and setting the configuration.

- Imperative Approach — In this approach we will use the installed argocd-cli to setup the application.
argocd app create demo-app \
--project default \
--repo https://github.com/Vinay-Venkatesh/GitOps.git \
--path simple-app \
--dest-namespace demo-app \
--dest-server https://kubernetes.default.svc \
--sync-option CreateNamespace=true
This will create an application named demo-app under default project with default settings
-
--project— name of the argocd project key-concepts -
--repo— Git repository to look for changes for this application for continuous reconciliation. -
--path— Specific path in the git repository where the project manifests are present. -
--dest-namespace— Destination cluster namespace for the application (demo-app) -
--dest-server— Destination cluster for the deployment (In this case we have chosen the default argocd cluster itself, we will discuss in detail about setup multi cluster deployment in later blogs) -
--sync-option— Sync options like automated prune, self heal, ApplyOutOfSyncOnly, CreateNamespace can be set here. CreateNamespace option will create a namespace specified in (–dest-namespace) if not present.
By running the above command creates the following in argocd.
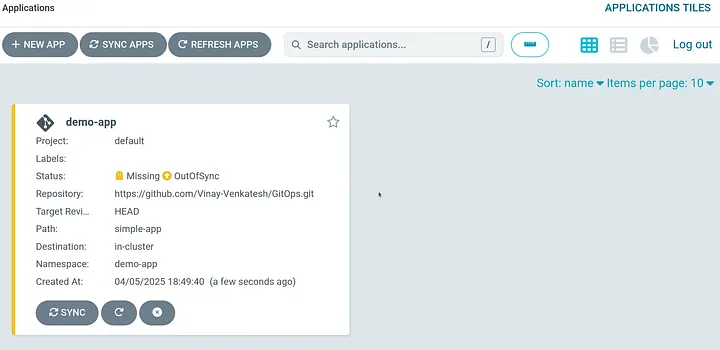
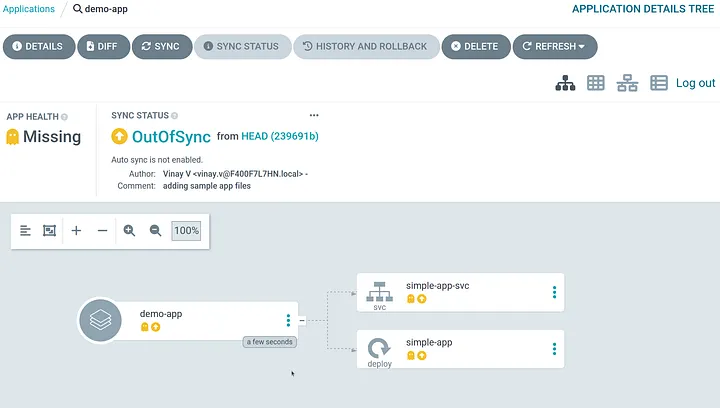
As you can notice the application is created in argocd but it remains out of sync (meaning its not yet deployed) because we have not enabled AutoSync option yet for the application.

To sync the application manually you can click on the SYNC option in the UI
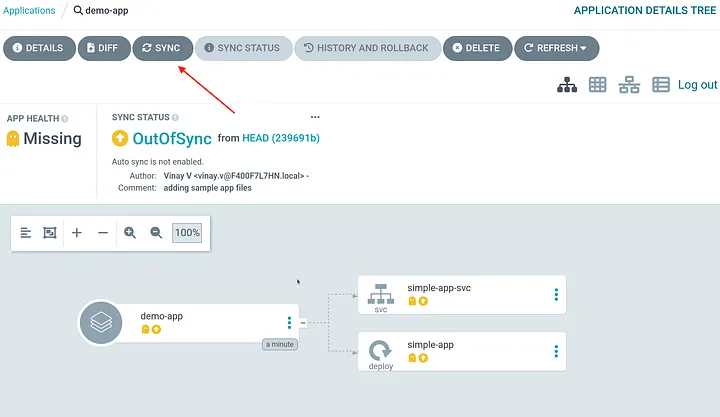
Post the SYNC, the application is successfully deployed.

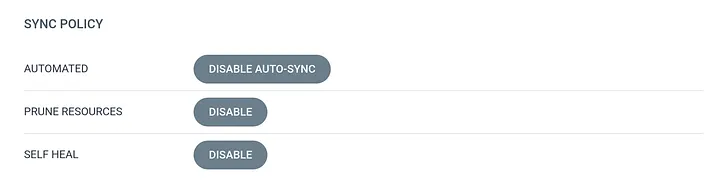
To update the sync options imperatively we can run the following command:
argocd app set demo-app \
--sync-policy automated \
--auto-prune \
--self-heal
SYNC POLICY is now updated in the application configuration.
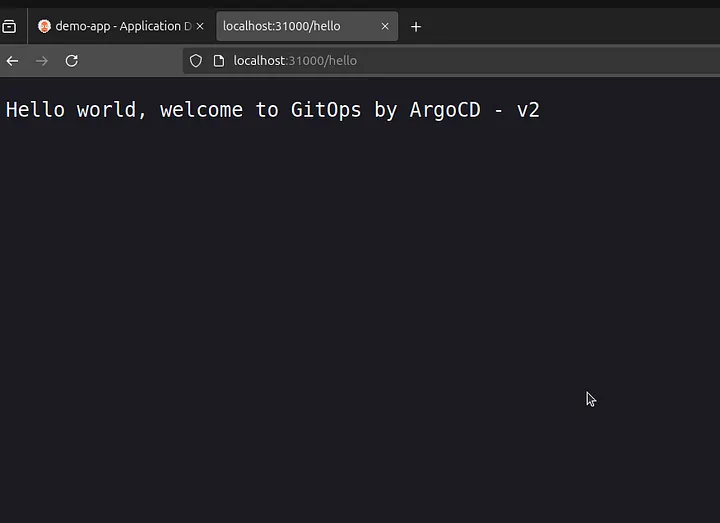
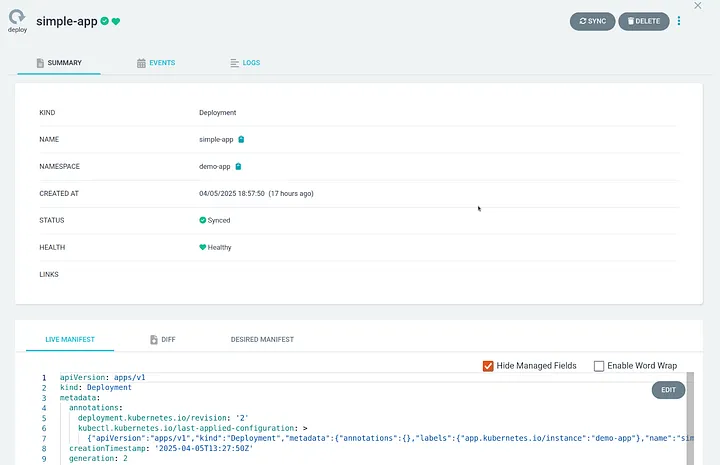
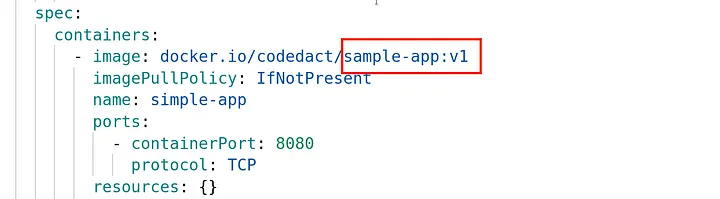
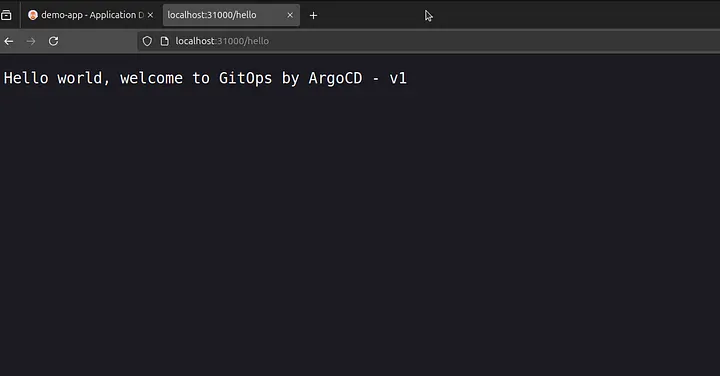
From the deployed application summary tab we can see that sample-app:v1 is now deployed and can be accessed via the nodeport — 31000 /hello
Sync strategies: #
- Manual or Automatic sync
- Auto-pruning of resources
- Self-Heal of cluster
-
Automatic sync will automatically deploy your application as soon as a drift is detected in your git repository. But if someone makes a manual change in the cluster, Argo CD will not do anything by default (it will still mark the application as out-of-sync though).
-
Self-Heal option ensures to discard any changes done manually to the cluster. This is a great advantage to protect the environments against ad-hoc changes via kubectl.
-
Auto-pruning of resources — Even after having auto-sync and self-heal options enabled, Argo CD will never delete resources from the cluster if you remove them in Git, auto prune option helps in deleting the resources automatically once its removed from git.
Automated Sync caveats: #
-
An automated sync will only be performed if the application is OutOfSync. Applications in a Synced or error state will not attempt automated sync.
-
Automated Sync will only attempt one synchronization per unique commit SHA1 and application parameter. It does not perfrom second sync for the same commit-SHA and parameter if it was already performed and is successful.
-
If selfHeal flag is set to true then sync will be attempted again after the self heal timeout (5 seconds by default) which is controlled by –self-heal-timeout-seconds this means automated sync will not reattempt a sync if the previous sync attempt against the same commit-SHA and parameter failed if selfHeal flag is not set.
-
Rollbacks cannot be performed against an application with automated sync enabled.
-
The automated sync internal is determined by timeout.reconciliation value in argocd-cm ConfigMap which defaults to 180sec
-
Declarative Approach — Creating the application using a YAML file and by running the command
kubectl apply <file>.yaml
sample-app-config.yaml
# Project creation

apiVersion: argoproj.io/v1alpha1
kind: AppProject
metadata:
  name: sample-project
  namespace: argocd
  # Finalizer that ensures that project is not deleted until it is not referenced by any application
  finalizers:
    - resources-finalizer.argocd.argoproj.io
spec:
  description: Thie project is for sample-application
  # manifests to be deployed from the source repository
  sourceRepos:
  - 'https://github.com/Vinay-Venkatesh/GitOps.git'
  # This project is specific to sample-app namespace in the same cluster
  destinations:
  - namespace: sample-app
    server: https://kubernetes.default.svc
  clusterResourceWhitelist:
    - group: '*'
      kind: '*'
  namespaceResourceWhitelist:
    - group: '*'
      kind: '*'

---

# Application creation with all syncPolicy in place.
apiVersion: argoproj.io/v1alpha1
kind: Application
metadata:
  name: demo-app
  namespace: argocd
spec:
  project: sample-project
  destination:
    namespace: sample-app
    server: https://kubernetes.default.svc
  source:
    repoURL: https://github.com/Vinay-Venkatesh/GitOps.git
    path: sample-app
  syncPolicy:
    automated:
      prune: true
      selfHeal: true
  syncOptions:
      - CreateNamespace=true
kubectl apply -f sample-app-config.yaml
This will create an argocd project named sample-project and deploy the application demo-app under the project sample-project
Application Updates and Reconciliation #
With the above configurations, whenever there is a change in git repository the application gets auto synced and argocd performs rolling deployment (by default) to all the related applications.
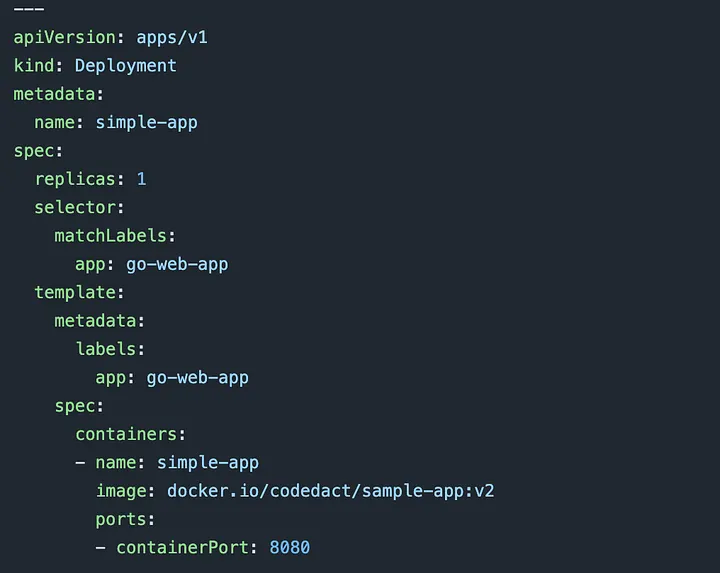
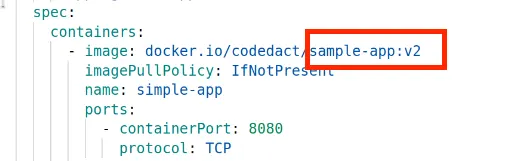
Updated the deployment.yaml in the repository — Changing the image version from v1 to v2
The above change will trigger an auto-sync in argocd.
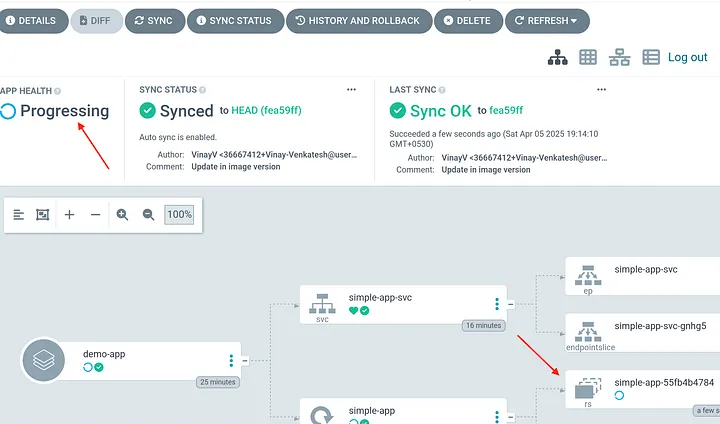
Container Image is now updated in application.
The new version of /hello is now accessible via the same nodePort.